Ben's Miniature Gallery
This is a gallery of my painted miniatures. Feel free to email me with any comments or questions.
Categories:
| Mialee added Sep 23, 2005 | |
 I got this mini as part of a box set of WotC iconic characters. I painted her to play an evil tiefling enchantress character that I only played once. I got this mini as part of a box set of WotC iconic characters. I painted her to play an evil tiefling enchantress character that I only played once.
|
|
| category: /other | permanent link | |
| Number Six (final) added Sep 23, 2005 | |

|
|
| category: /other | permanent link | |
| Mercenary (sculpt) added Sep 23, 2005 | |
 It took some doing to get the rifle to sit in the right place. Its still not perfect, but it's pretty close to where I wanted it to be. I'm starting to feel more comfortable with the Milliput, taking a little piece at a time off of the large strip I rolled out earlier today. The face on this one is a little hard to see in this picture. It's still not perfect, but it looks a lot better than the other ones I have done. the hair turned out great; hair is a lot easier than faces. It took some doing to get the rifle to sit in the right place. Its still not perfect, but it's pretty close to where I wanted it to be. I'm starting to feel more comfortable with the Milliput, taking a little piece at a time off of the large strip I rolled out earlier today. The face on this one is a little hard to see in this picture. It's still not perfect, but it looks a lot better than the other ones I have done. the hair turned out great; hair is a lot easier than faces.
|
|
| category: /other | permanent link | |
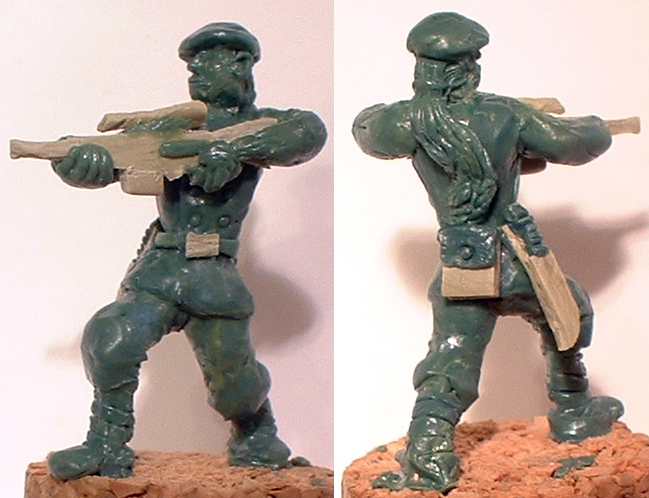
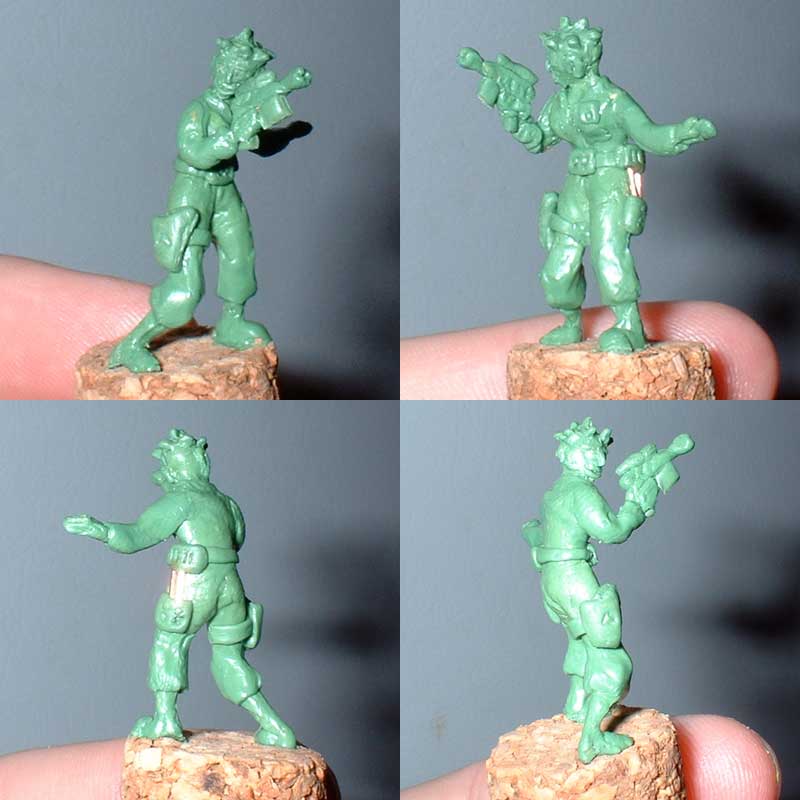
| Mercenary (sculpt) added Sep 23, 2005 | |
 Another Traveller sculpt, this time a gun-slinging mercenary. Even though I don't expect to ever cast any of these, I decided to stop using the styrene and other materials that wouldn't survive the mold-making process. I rolled out a long, thin piece of GS and rolled it flat, then left it to cure for a while. I've been cutting pieces off of it for belts, and it works quite well. I also made a vaguely rectangular strip of Milliput, which took a while to cure to the point where I could cut it. It's my first time working with Milliput, so I'm having to get used to how it works. I've been able to make a passable rifle, which will hopefully make an appearance in the next set of pictures. I've been trying to get my surfaces smoother and work in smaller stages this time, and I think it's paying off. I also got rid of the fiddly wire loops I've been using for head armatures, instead sticking a short, straight piece of wire into the torso after putting on the first coat of putty. It seems to be sturdy enough so far. Another Traveller sculpt, this time a gun-slinging mercenary. Even though I don't expect to ever cast any of these, I decided to stop using the styrene and other materials that wouldn't survive the mold-making process. I rolled out a long, thin piece of GS and rolled it flat, then left it to cure for a while. I've been cutting pieces off of it for belts, and it works quite well. I also made a vaguely rectangular strip of Milliput, which took a while to cure to the point where I could cut it. It's my first time working with Milliput, so I'm having to get used to how it works. I've been able to make a passable rifle, which will hopefully make an appearance in the next set of pictures. I've been trying to get my surfaces smoother and work in smaller stages this time, and I think it's paying off. I also got rid of the fiddly wire loops I've been using for head armatures, instead sticking a short, straight piece of wire into the torso after putting on the first coat of putty. It seems to be sturdy enough so far.
|
|
| category: /other | permanent link | |
| Mercenary (final) added Sep 23, 2005 | |
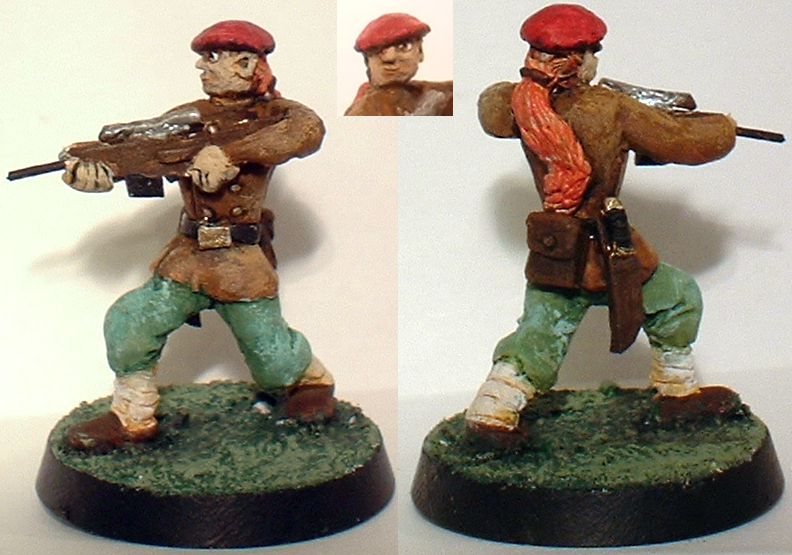 This is my favorite one so far. The scope on the rifle is a little rough, and the original barrel broke off, so I had to drill a hole and replace it with copper wire. This is my favorite one so far. The scope on the rifle is a little rough, and the original barrel broke off, so I had to drill a hole and replace it with copper wire.
|
|
| category: /other | permanent link | |
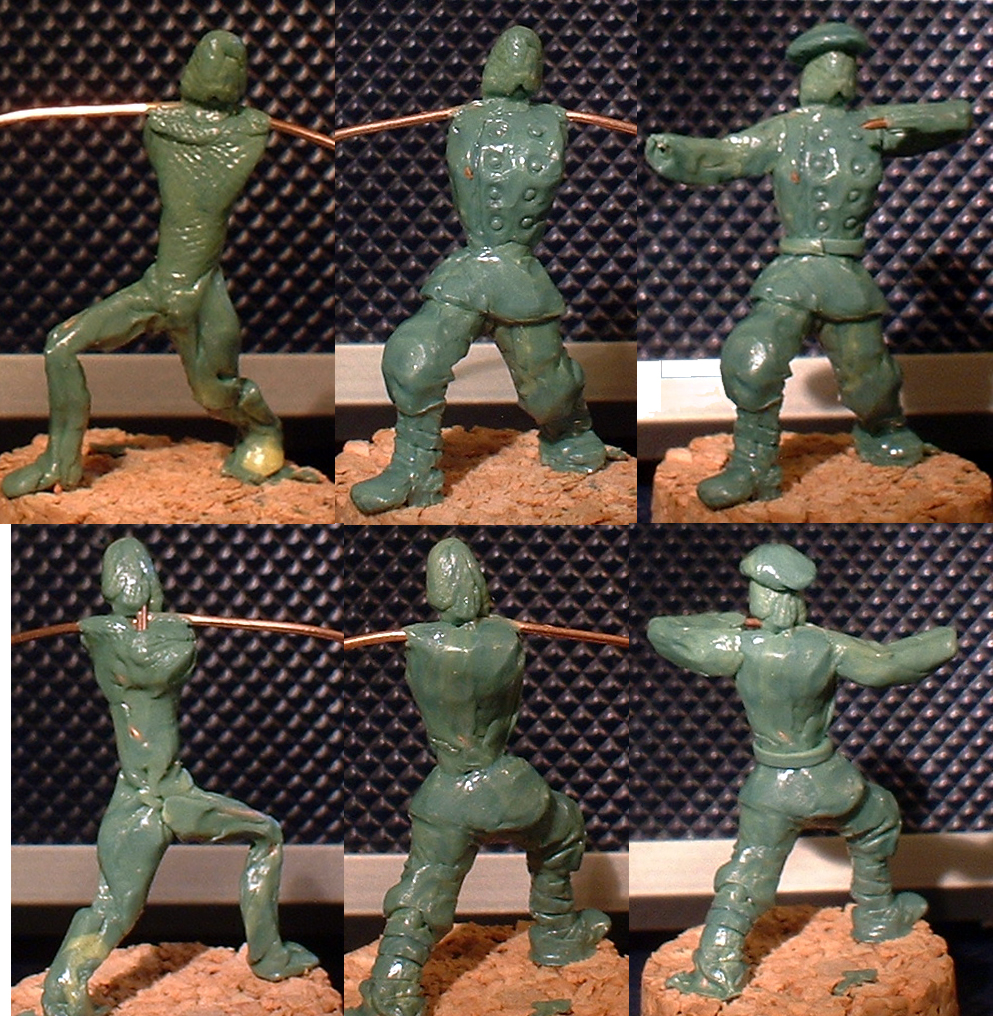
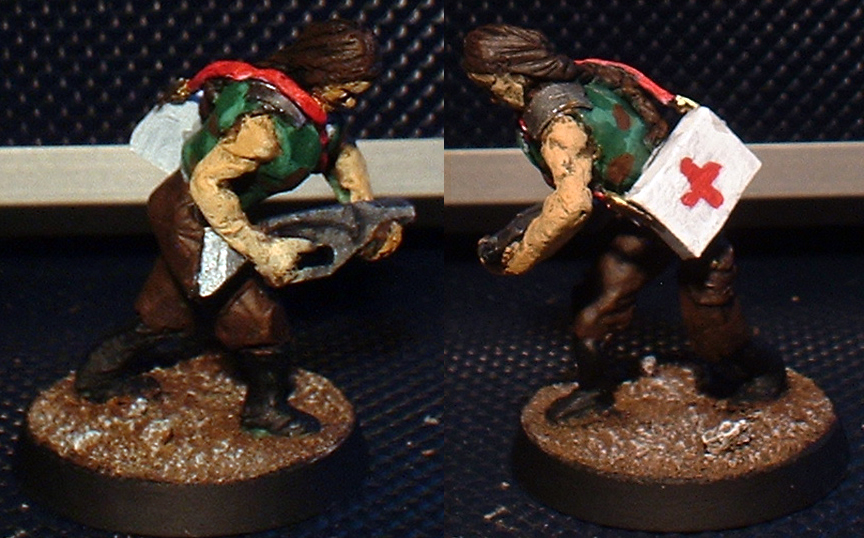
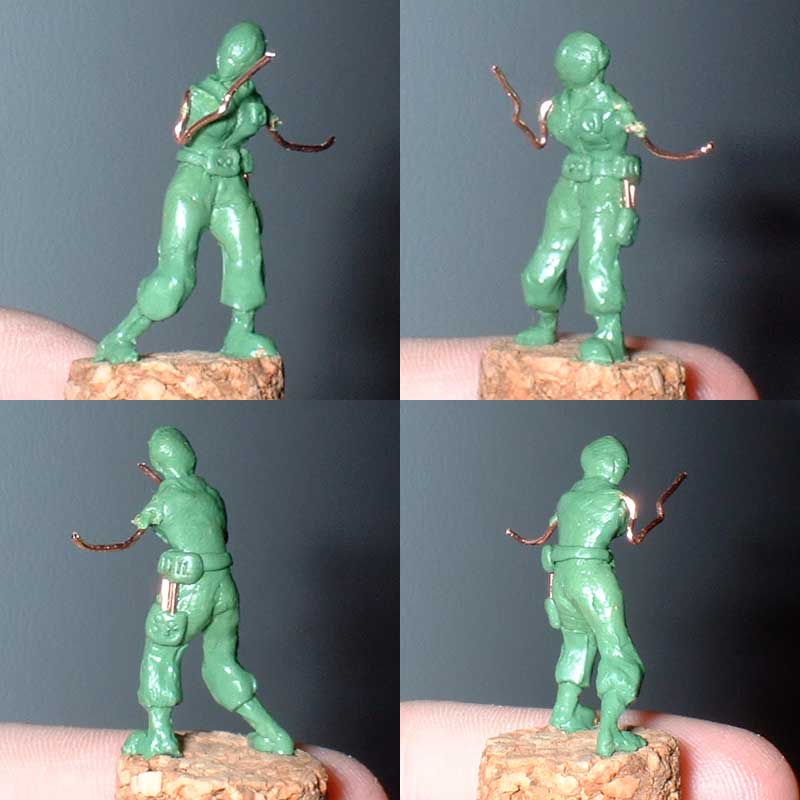
| Marine Medic (sculpt) added Sep 23, 2005 | |
 I decided to do two sculpts at once this time, so each one would have some time to cure while I was working on the other. I forgot to take an intermediate picture, but there wasn't anything too exciting going on. I'm pretty happy with the pose on this one; it's a little more dynamic than the "standing around" poses I've done so far. these two were the first sculpts that I tried doing hair on. After the success I had on the Vargr's fur, I felt pretty confident that I could do hair, and it seems to have turned out pretty well. I'm also feeling better about my faces. This one isn't exactly pretty, but it's not much uglier than some of the old Grenadier minis I have kicking around. this is also the first time I've tried doing bare arms. I think they look okay, but we'll see how they paint up. I decided to do two sculpts at once this time, so each one would have some time to cure while I was working on the other. I forgot to take an intermediate picture, but there wasn't anything too exciting going on. I'm pretty happy with the pose on this one; it's a little more dynamic than the "standing around" poses I've done so far. these two were the first sculpts that I tried doing hair on. After the success I had on the Vargr's fur, I felt pretty confident that I could do hair, and it seems to have turned out pretty well. I'm also feeling better about my faces. This one isn't exactly pretty, but it's not much uglier than some of the old Grenadier minis I have kicking around. this is also the first time I've tried doing bare arms. I think they look okay, but we'll see how they paint up.
There are a few more things I want to add before I call it finished. First, I want to add a little more detail to the rifle (which is carved from a piece of sprue). I'll also probably remove the strap from the medkit (except the very ends where they connect o the kit) and replace it with a green stuff strap. The sheet styrene worked well for building up the kit and the armor plates on her shoulders, but it's not flexible enough to make a convincing shoulder strap. Fortunately, it's not really connected over the shoulder areas so it should just fall away when I snip it. |
|
| category: /other | permanent link | |
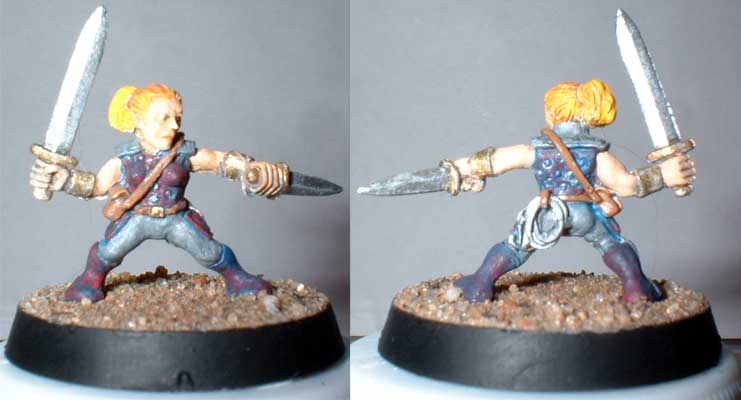
| Marine (final) added Sep 23, 2005 | |
 The basic pose of this one I like, but the sculpt itself is pretty rough. It'll do for now, but I plan to make a new one later if the game runs long enough to warrant it. I ended up cutting the left arm and making a new elbow. The basic pose of this one I like, but the sculpt itself is pretty rough. It'll do for now, but I plan to make a new one later if the game runs long enough to warrant it. I ended up cutting the left arm and making a new elbow.
|
|
| category: /other | permanent link | |
| Lidda added Sep 23, 2005 | |
 This is one of the WotC iconic characters. She's a properly proportioned halfling, which means she's really really tiny! This is one of the WotC iconic characters. She's a properly proportioned halfling, which means she's really really tiny!
|
|
| category: /other | permanent link | |
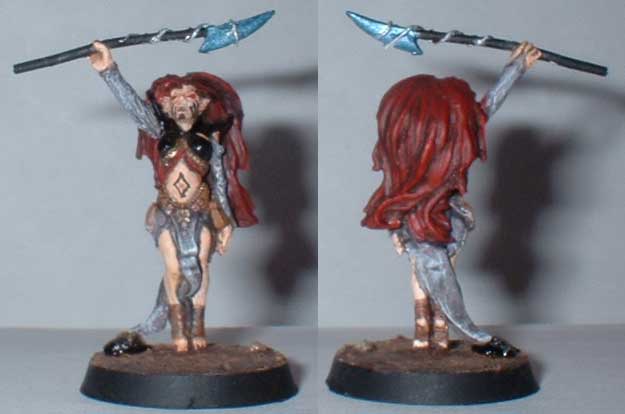
| Kade Mireth-Orat (part 5) added Sep 23, 2005 | |
 I'm glad her face is going to be covered with tattoos, because it's not very attractive. The underlying head shape was pretty well cured, so I had to add more putty to form the brow, nose, and mouth. I also had to work around the right arm, so it didn't turn out quite as well as I would have liked. For the horns, I laid a small roll of putty around the crown of the head, then pinched it into horns. I smoothed the putty between the horns into the surounding skull, which helped to cover some of the earlier imperfections. I also added another small strip with two more horns at the top of the head. The ears were simple blobs stuck to the sides of the head, smoothed, and shaped. I had to rebuild one of them because I accidnetally smashed it with my finger while making the second one. The left hand also had to be rebuilt, and the blaster needed to be nudged back into position. Hopefully everything will cure to a more durable state now that I can leave it alone. I'll try to touch things up once it's fully cured (I'll wait until tomorrow at least, to give it as much time as possible). Hopefully it will look better painted than it does green. Still, I'm pretty happy with the basic proportions and shape, considering it's my first attempt at sculpting. I'm glad her face is going to be covered with tattoos, because it's not very attractive. The underlying head shape was pretty well cured, so I had to add more putty to form the brow, nose, and mouth. I also had to work around the right arm, so it didn't turn out quite as well as I would have liked. For the horns, I laid a small roll of putty around the crown of the head, then pinched it into horns. I smoothed the putty between the horns into the surounding skull, which helped to cover some of the earlier imperfections. I also added another small strip with two more horns at the top of the head. The ears were simple blobs stuck to the sides of the head, smoothed, and shaped. I had to rebuild one of them because I accidnetally smashed it with my finger while making the second one. The left hand also had to be rebuilt, and the blaster needed to be nudged back into position. Hopefully everything will cure to a more durable state now that I can leave it alone. I'll try to touch things up once it's fully cured (I'll wait until tomorrow at least, to give it as much time as possible). Hopefully it will look better painted than it does green. Still, I'm pretty happy with the basic proportions and shape, considering it's my first attempt at sculpting.
|
|
| category: /other | permanent link | |
| Kade Mireth-Orat (part 3) added Sep 23, 2005 | |
 Nothing much was changed on the body itself except for adding the opening at the front of the jumpsuit -- just a simple line. At the end of the last stage I made a small roll of putty and laid it on a glossy cardstock brochure (my work surface). I flattened it some and left it to cure a little. When I came back I began cutting off pieces of the roll to add accessories. First I made a belt with a rectangular buckle. Using another good hint I made the round studs using a mechanical pencil tip with the lead retracted. It works amazingly well. Then I added a rank plaque on the chest of the jumpsuit, marked with a single pip in the corner. Finally, I added some sort of gadgetry on the left leg, inspired by the life support apparatus I'd seen on space suits. I connected the box on the leg to a belt pack by two short pieces of copper wire. The markings were done with the pencil and a small eyeglass screwdriver. Nothing much was changed on the body itself except for adding the opening at the front of the jumpsuit -- just a simple line. At the end of the last stage I made a small roll of putty and laid it on a glossy cardstock brochure (my work surface). I flattened it some and left it to cure a little. When I came back I began cutting off pieces of the roll to add accessories. First I made a belt with a rectangular buckle. Using another good hint I made the round studs using a mechanical pencil tip with the lead retracted. It works amazingly well. Then I added a rank plaque on the chest of the jumpsuit, marked with a single pip in the corner. Finally, I added some sort of gadgetry on the left leg, inspired by the life support apparatus I'd seen on space suits. I connected the box on the leg to a belt pack by two short pieces of copper wire. The markings were done with the pencil and a small eyeglass screwdriver.
I finally cut down the arm wires and bent them into position. I decided to make the armature for the blaster part of the arm wire, which should make it as stable as possible. It really shouldn't be a huge blaster, but I'll just have to see how it looks when I start sculpting it. Ther eare still some fingerprints and other imperfections on the body, and I'm not sure how I can smooth them out without adding another layer of putty. I may end up doing just that if I can't find any other way, but I don't want to add extra bulk; I'm pretty happy with the shape of the body as it is. I may wait until the whole thing is fully cured and try to file the surface smooth. I'm not sure how to tell when that is; so far it's been several hours and the putty is still somewhat flexible. It may never be rock hard. I'm also hoping to get a chance at some point to file the edges of some of the accessories more square. |
|
| category: /other | permanent link | |