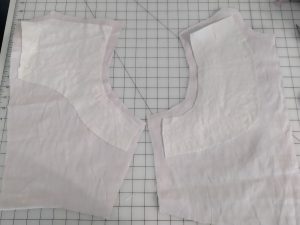
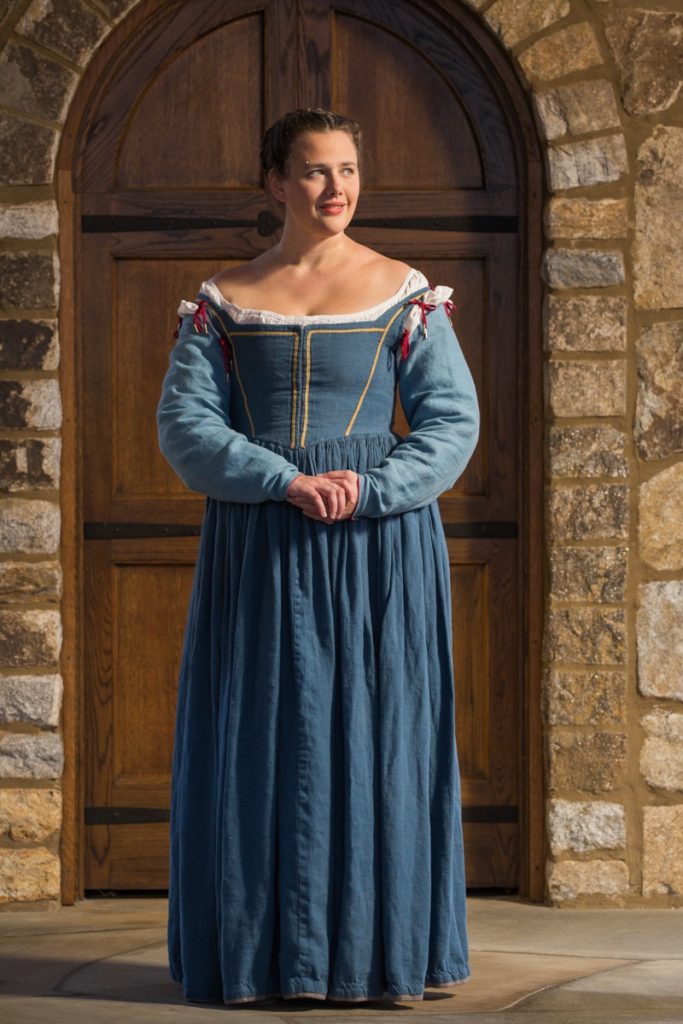
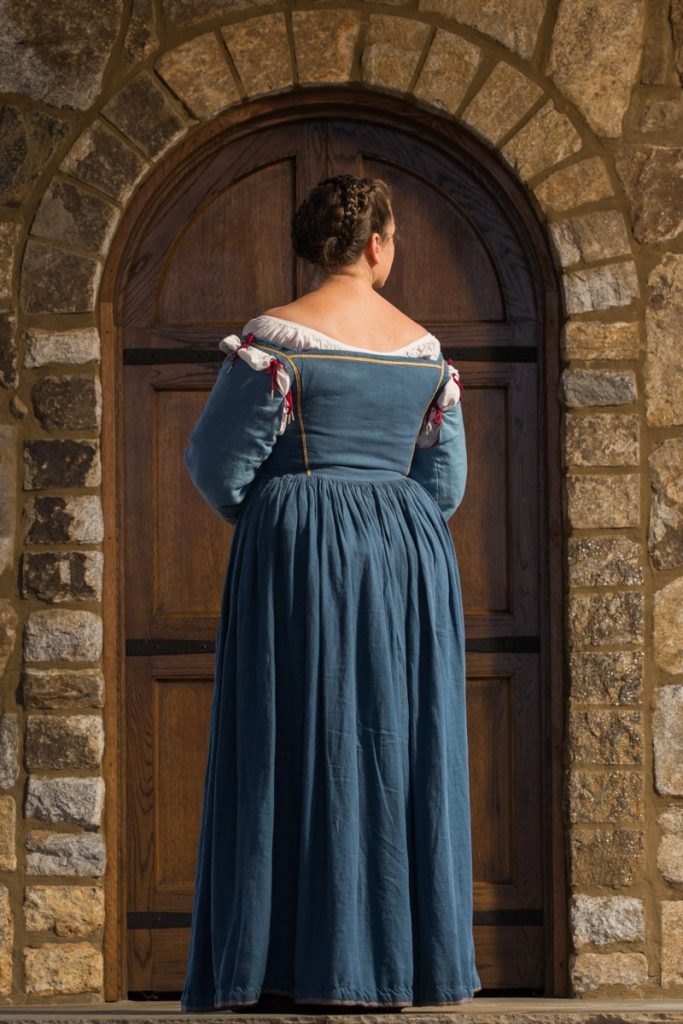
I love providing the finishing touches of trims and ties for historical garments, but before that you need to have a good foundation. Mathew Gnagy has provided this in his recent publication The Modern Maker Vol. 2: Pattern Manual 1580-1640. Here are several of the outfits I was pleased to make for the book and I loved working with his recreations of patterns by the Spanish Masters. The supportive kirtle is laced with ourhand woven cotton tapes in Duck.
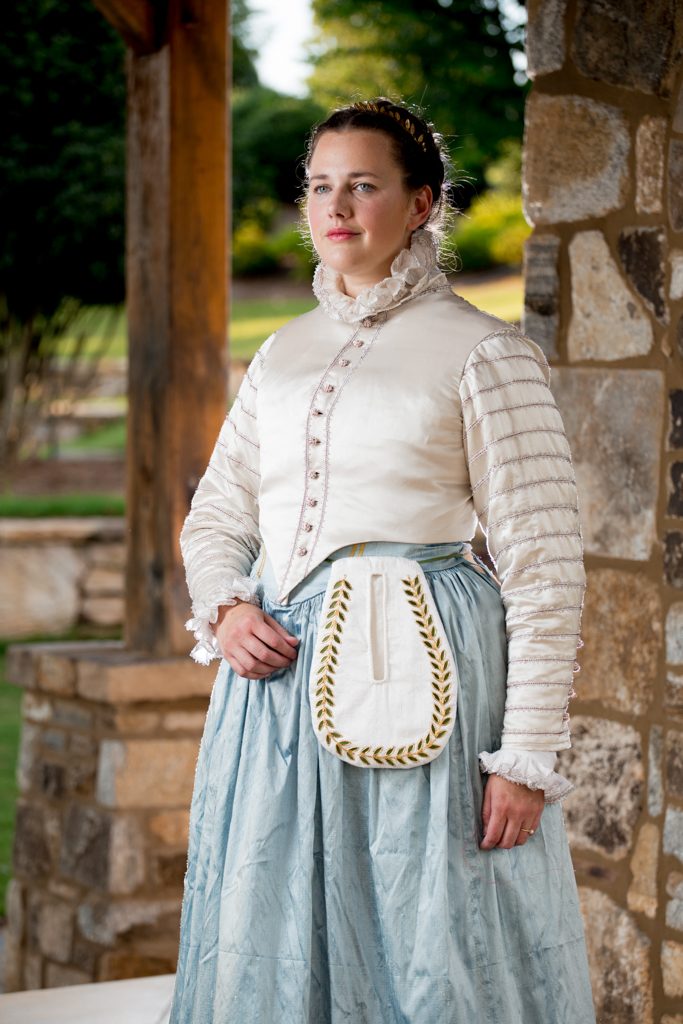
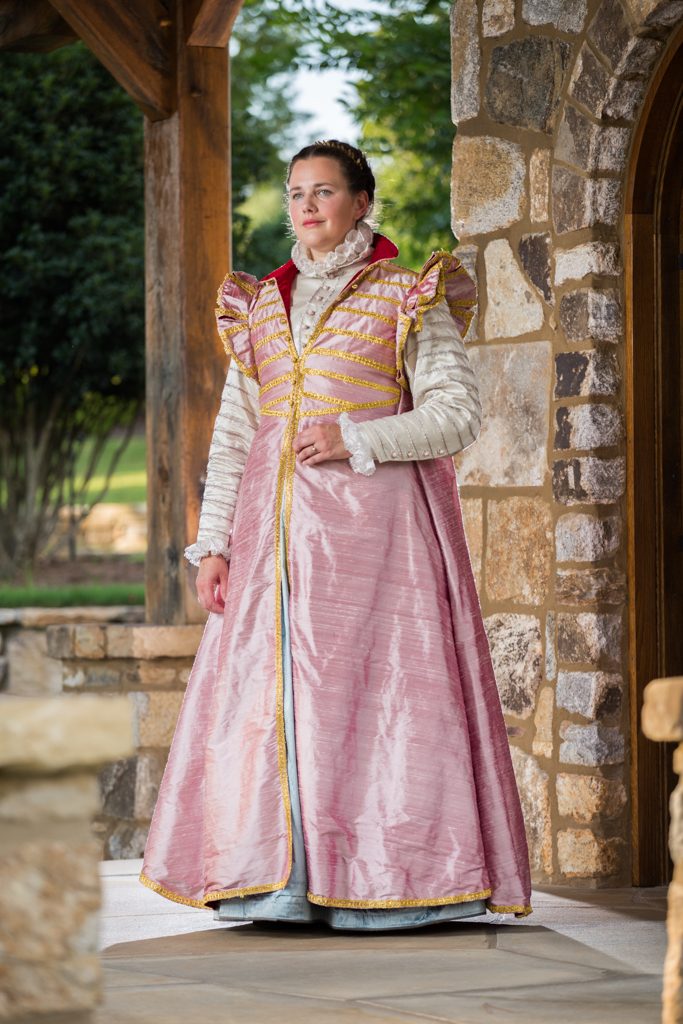
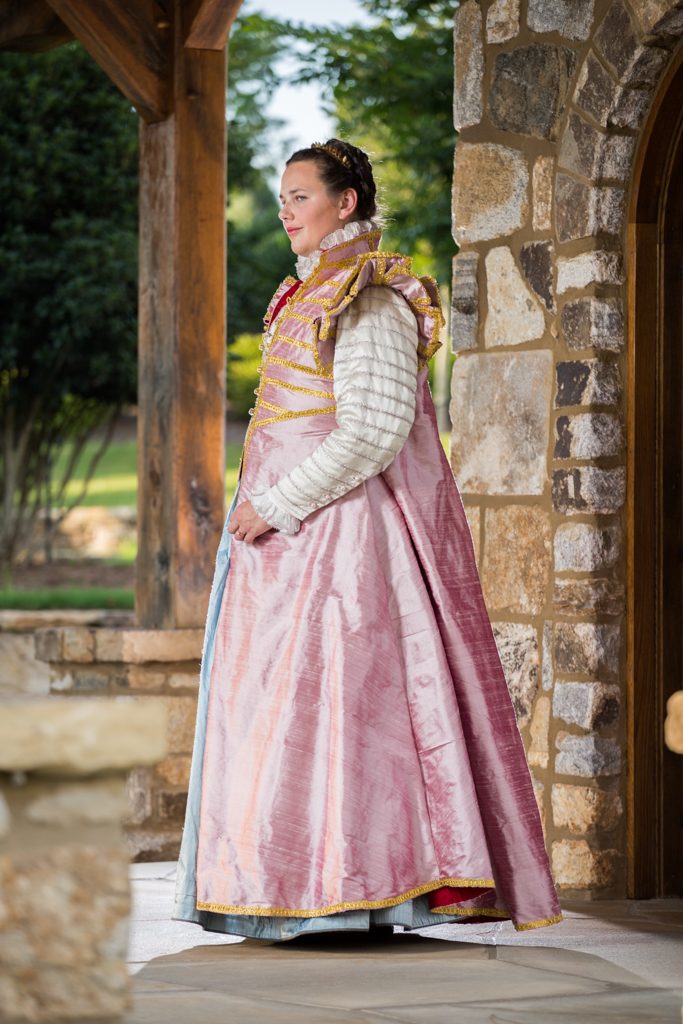
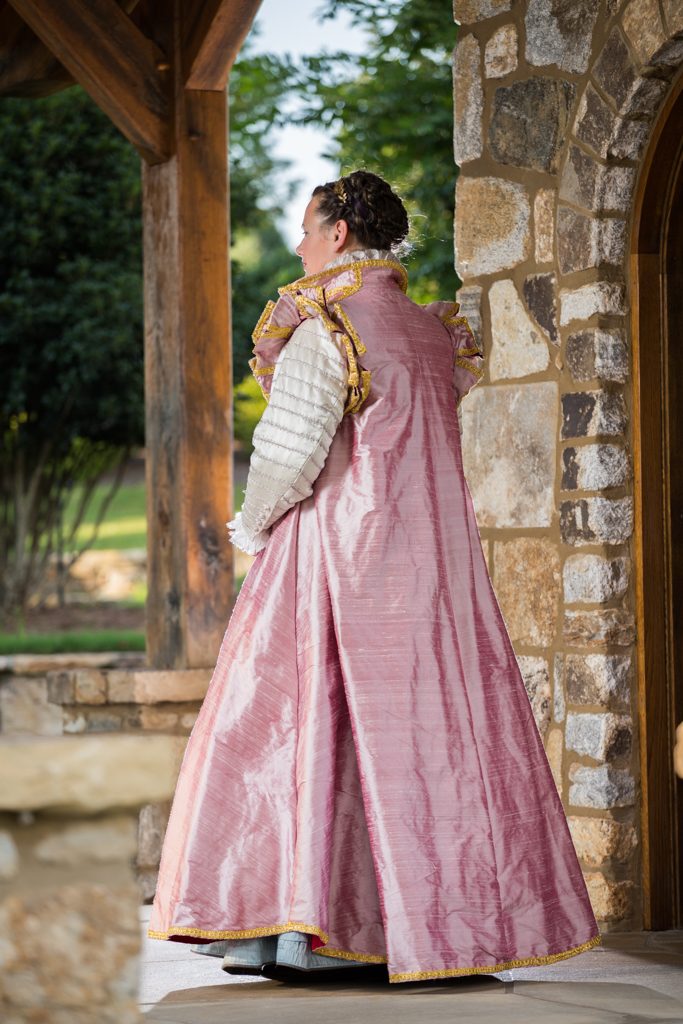
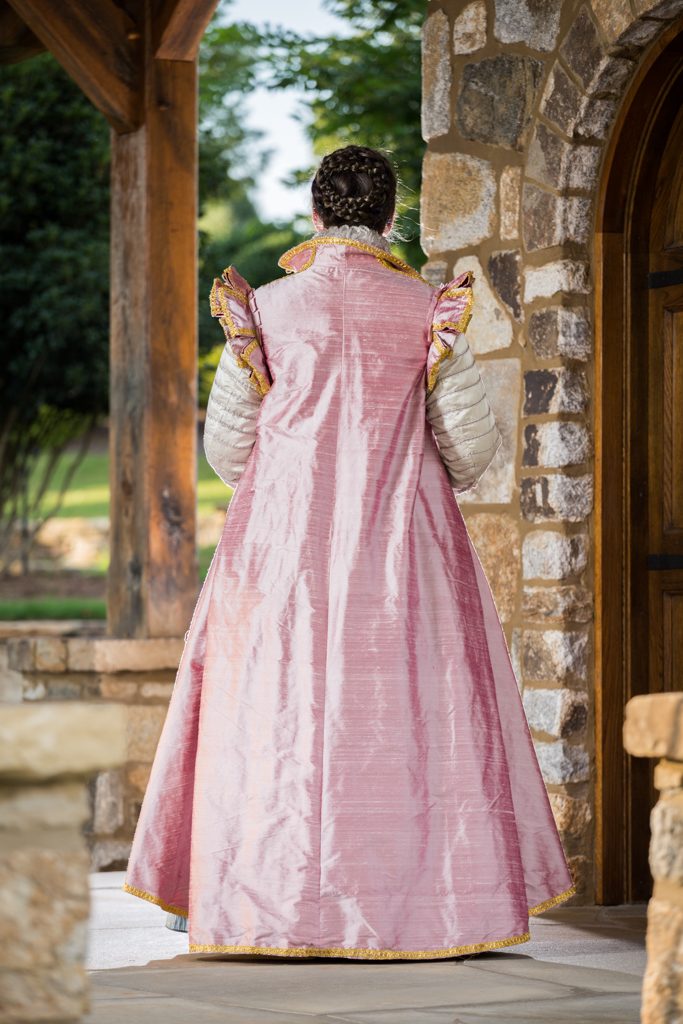
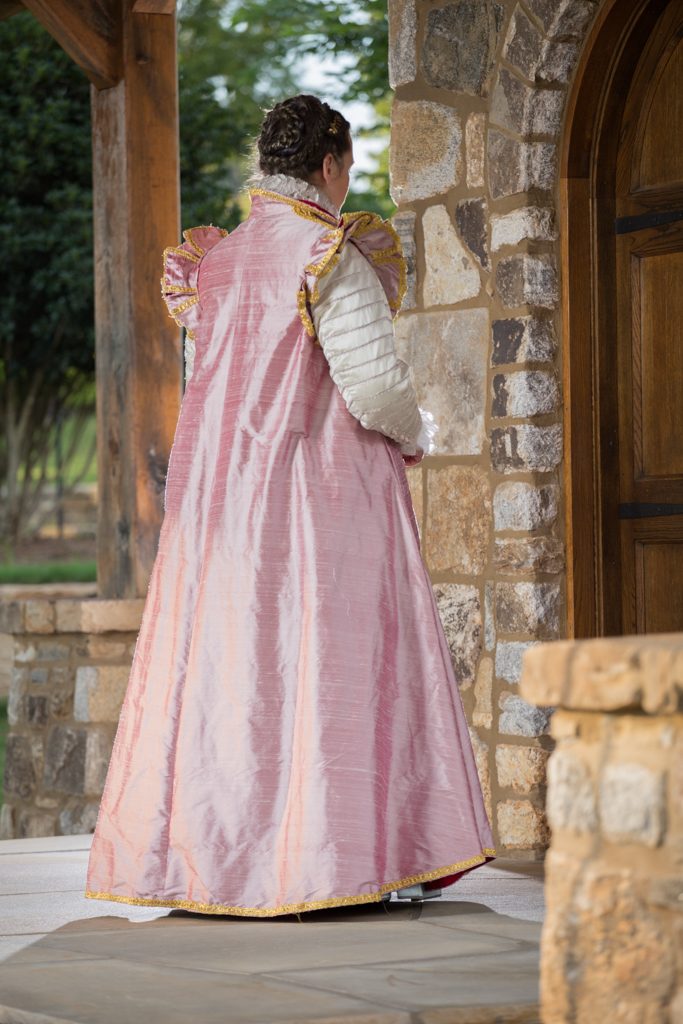
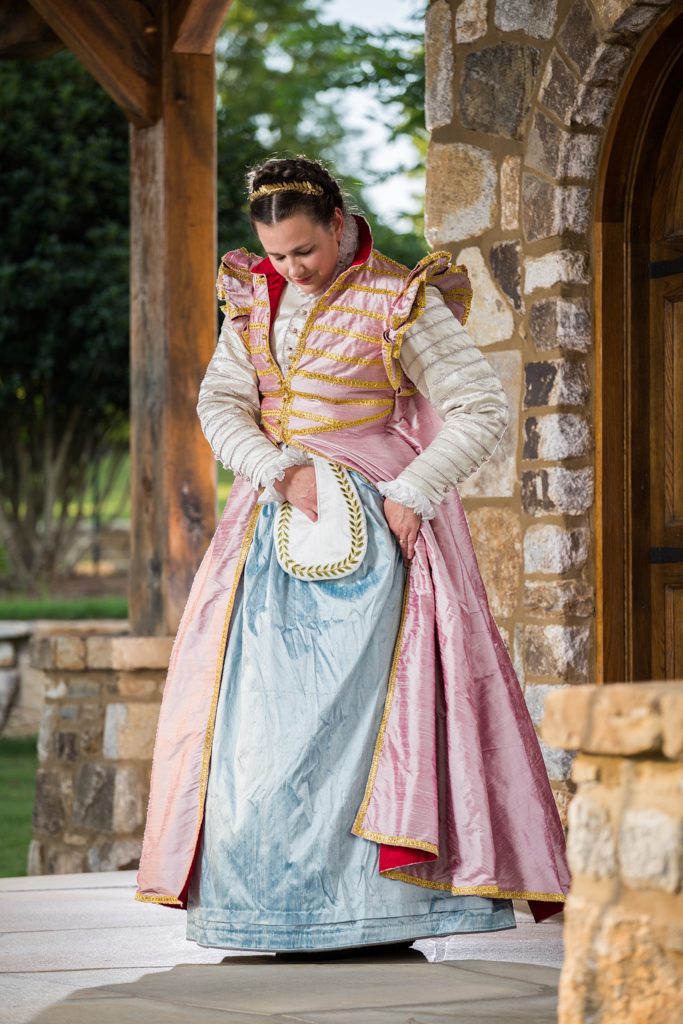
A few months ago a stumbled upon a portrait attributed to Alessandro Allori approximately from the 1570’s based on the style of the clothing. I fell in in love and that was that! I had to have this dress. Of course, as is the way of most 16th century clothes, this meant making several layers of clothing. At the same time the Realm of Venus began its Italian Renaissance Costume Challenge which involves making a 4 layer outfit in 4 months. I signed up and this is the result.
Partlet with Attached Ruff
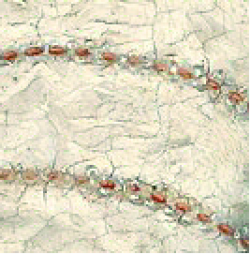
The first layer I began was the partlet with attached ruff and cuffs . This was a particularly fun challenge as I have never made a ruff before. Looking closely at the portrait it appears that the ruffled edge is trimmed in silver bobbin lace with a decorative running stitch in red. I had never made bobbin lace , but I love a challenge!
Single picot bobbin lace
I made 7 yards of 4 strand single picot bobbin lace using silver toned copper thread . At first I was nervous about jumping in to lace making with metallic threads, but the real metal content made it much easier to work with than I thought. This proved to be just enough to edge both the ruff and the cuffs.
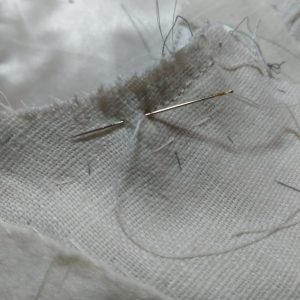
For the construction of the Ruff I used the instructions provided on the Elizabethan Costuming Facebook Group, written by Noel Gieleghem. I opted to do all the construction by hand as it is easier to control the process .
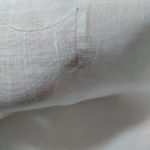
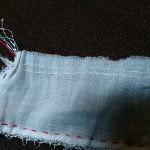
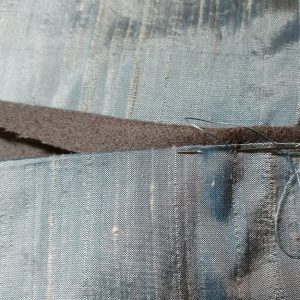
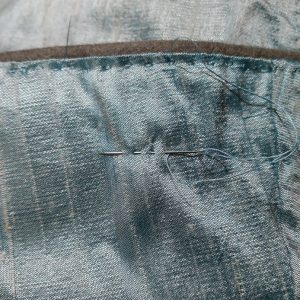
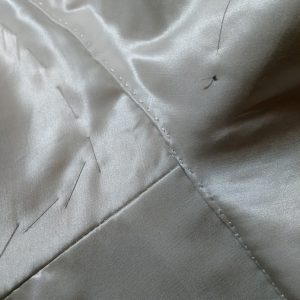
One thread drawn out of the ground fabric to create a guide for cutting.
Tiny whip stitch used to join lengths to create the ruffle.
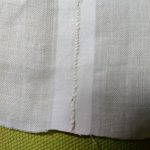
Running stitch used to hem.
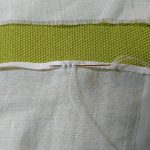
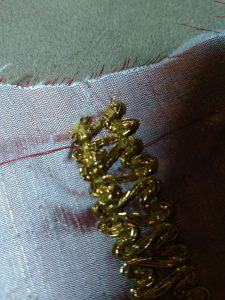
Bobbin lace applied and running stitch in red silk thread.
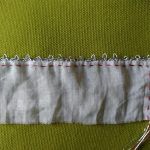
Double running stitch used to create the tiny cartridge pleats.
Ruffle being attached to collar using whip stitch.
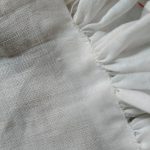
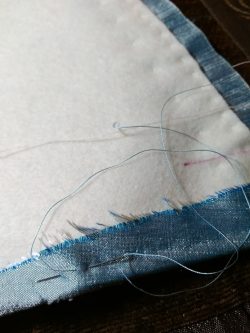
Sadly I was unable to get pictures of the starching process, as my hands were covered in the sticky stuff! I used a combination of wheat, rice and barley starch and WOW its stiff! As the cuffs in the portrait do not appear to be set, I did not starch them. I am surprised at how comfortable the ruff is to wear, even with how stiff it is. It was not scratchy at all and was actually more comfortable to wear than when it was starched. Even after a 3 hour photo shoot in super humidity and 90 + degree temperatures, the starch held firm!
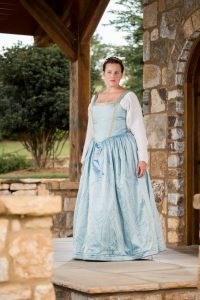
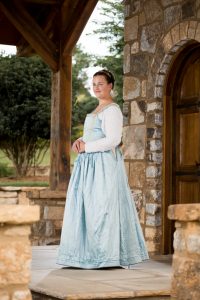
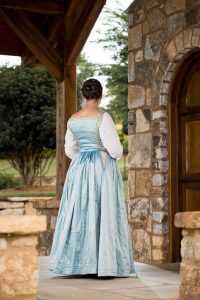
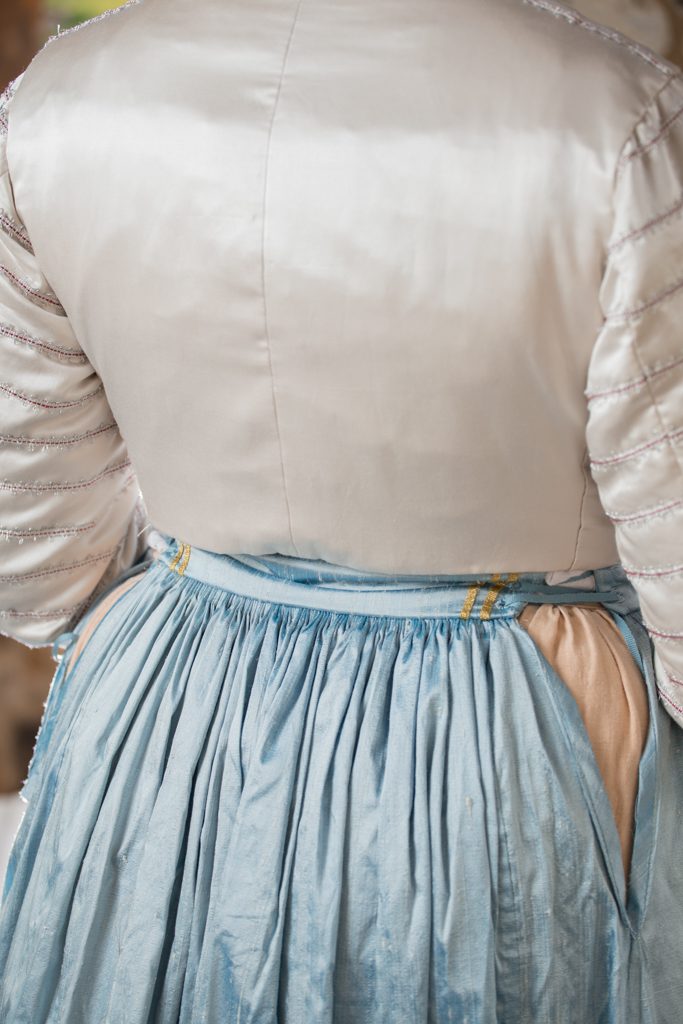
Sottana
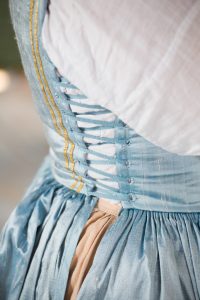
The next layer is the sottana, or underdress / petticoat. It is possible that the visible part of the original outfit would have been a separate skirt tied to doublet worn over a sportive kirtle or bodies similar to the velvet ones found in Eleonora d’Medici’s burial outfit. . Because it is rarely cool enough in my area to wear this many layers, I decided to maximize the use of my fabric and time by making a sleeveless sottona that I can wear on its own.
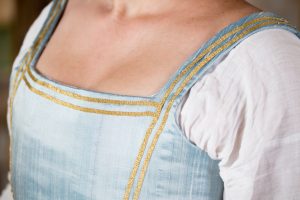
A sottona of turchino (sky blue) is noted in the inventories of Elenora’s clothing and I loved the way the blue played with the red/pink of the planned veste (overgown) . The fabric I have used is a silk dupioni that is turquoise shot with white. The interlining is a lightweight linen stiffened with hide glue. Hide glue stiffening is an on going experiment for me. In this iteration I made a thin glue that , when dry, resulted in something similar to modern buckram. This stiffened layer was padded with thin wool to soften the line of the bodice a bit. After trimming the seam allowances of this interlining layer, the trimmed silk was wrapped around and affixed with prick stitch. Felling stitch was used to sewn in the light weight linen lining. Silk buttonhole thread was used to sew the eyelets.
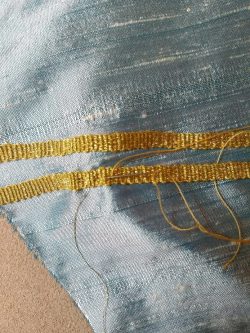
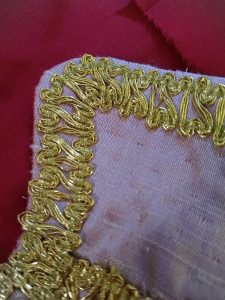
Attaching the gold petersham with a combination of running and back stitch.
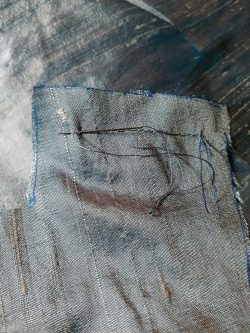
Back stitching the shoulder seam.
Silk buttonhole twist used for the eyelets
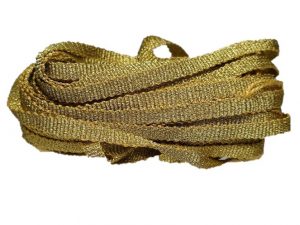
The trim used on the bodice is 1/4 inch gold petersham. and it was very easy to work with when sewing. The trim placement was inspired by that in in several portraits of Eleonora d’Medici.
1/4″ gold petersham
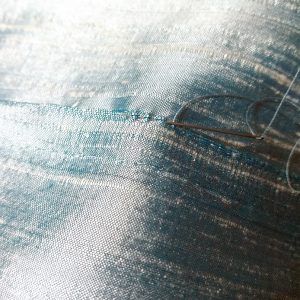
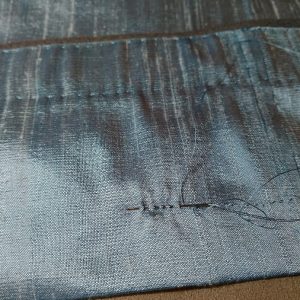
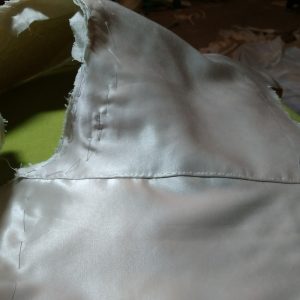
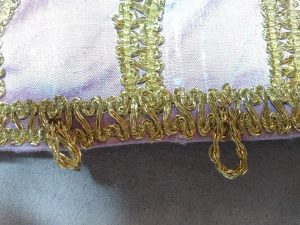
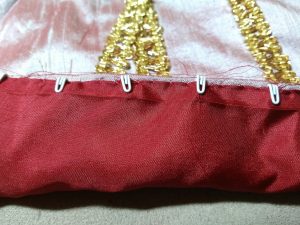
The skirt is constructed from rectangular panels with gores on the side . In historical examples, the seam edges are often left raw or beeswax is used to finish. As this particular dupioni silk is extra prone to fraying , I used a felled seam as would have been used for linen fabric. The waist is gathered in to small cartridge pleats and attached the lower edge of the bodice in the same manner as was the ruff to collar in the partlet. The hem is stiffened with a strip of wool, this also helps prevent water from wicking up the skirt , and prevents wear on the hem as this strip is easily replaced. After hemming, a tuck is sewn a little above. This tuck could be let out for length as a garment passed between owners or for pregnancy. I have also found that it helps just a wee bit more in holding out the skirt and giving nice body.
Skirt seam felled with running stitch
Adding the wool facing to the hem.
Finishing the hem.
Adding the tuck.
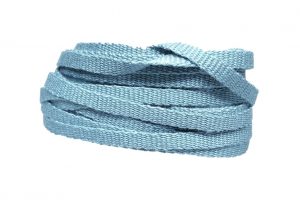
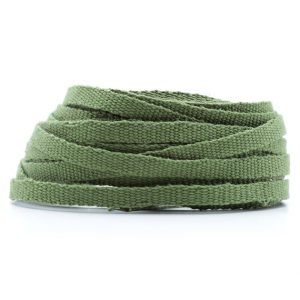
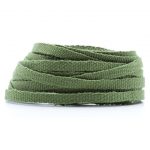
The last bit is to lace it up! For this I used 3/16 inch cotton tapes in mineral. I prefer extra long tapes so I can loosen it rather than unlace every time.
3/16″ cotton tape
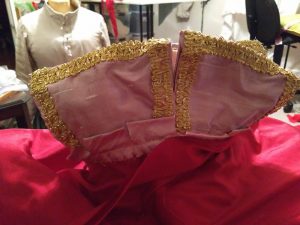
Guibonne
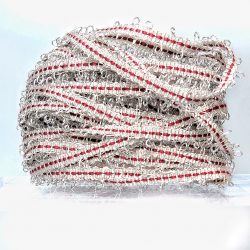
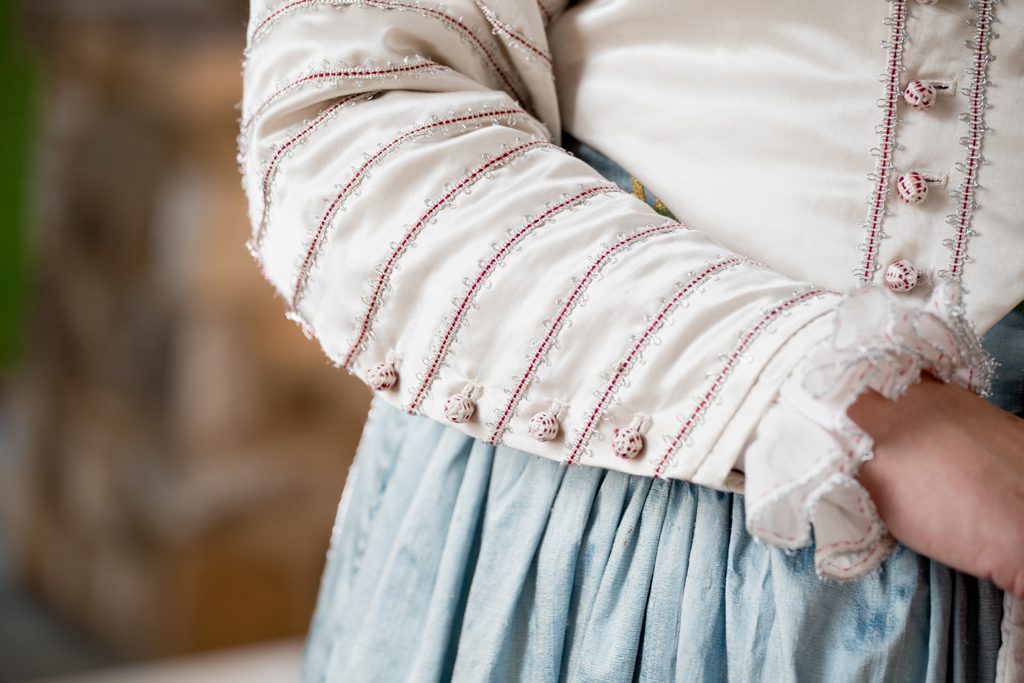
The guibonne (doublet). The first step was weaving the trim. Closeups of the portrait did not yield a perfect picture of what this trim would look like. The trim I came up with to approximate the look is woven from silver plated copper, copper and silk threads. The real metal adds an amazing amount of structure to the finished piece.
Right at the time I needed to draft the doublet, I was able to attend The Modern Maker workshops offered by Matthew Gnagy in Georgia. The first of which was pattern drafting using the bara system, the second was doublet construction. Both of these classes were total and complete magic! If you get the chance to take one , do not hesitate. More information can be found on the Modern Maker Facebook page.
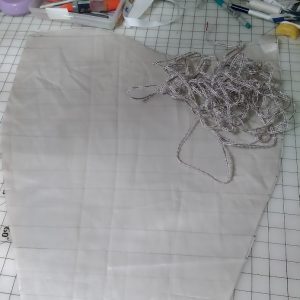
Using the draft based on Alcega I constructed the doublet from a stable lightweight silk faced satin, interfaced in linen canvas with wool padding , and linen lining. The first step was trimming the sleeves. This part always takes the longest, so I have found it easier to get it done first. After marking the placement lines, each line was based to the linen interlining to prevent shifting of layers during application. A combination of running stitch with the occasional back stitch were used to affix the trim. Highlights from the construction process as follows:
Marking the lines for the trim.
Adding the trim with the aid of my trusty tailors thimble.
This style of facing can be seen in the burial doublet of Cosimo d’Medici.
The collar is only one spot pad stiching is needed, but the effect is most visible here.
More pad stitching, steaming, stretching, and more are used to manipulate the fabric to make room for the bust.
Back stitch is very strong and good for attaching the collar.
Buttonholes sewn with silk twist.
I love the junction of the side collar seam and the shoulder.
With all the construction done, all that is left is to add the buttons! The portrait hinted at an alternating red mixed with the cream color of the doublet. Using the same silk thread from the trim and buttonholes, I made thread wrapped buttons around a wooden core.
After attaching the buttons, the lining was inserted. Another layer finished!
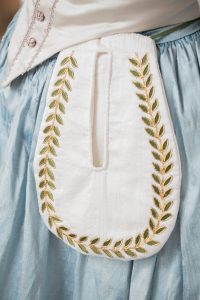
Soccacia
Whats that tied at my waist? Its a soccacia ( pocket) and its super handy. This one I made big enough to hold my enormous phone, keys and other bits at events. These types of pockets were worn under dresses tied to the waist or bodies. I’m wearing in on top of my sottona so that you can see it here. In the future it will be tucked away out of sight.
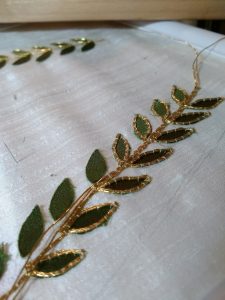
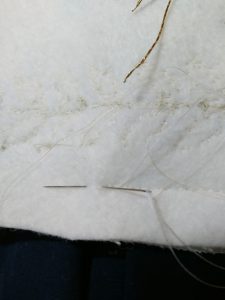
White silk dupioni is used for the outer, lined in linen, and it is interlined with wool felt. This type of interlining is seen in extant Spanish versions. The wool made the process of couching the gold much smoother. The silk leaves were first attached to cotton paper using hide glue, this technique is mentioned in Janet Arnold’s Patterns of Fashion. The glue keeps the silk from fraying and the paper stabilizes it to make the applique quite simple. After positioning the leaves, Two strands of Imitation Japan Gold thread were couched using silk thread to hold them in place. The outside layers are sewn together with back stitch to make sure its strong enough to hold all my stuff.
Looking closely at the portrait, veste (overgown) is fitted in the front but loose in the back. One of the clues to this is the lack of any type of belt in addition to the shadow of the loose back. A similar style of garment can be found in Alcega’s tailor’s manual, but it is a separate front skirt and doublet style front. To achieve the smooth front line without a waist seam, I chose to use a pattern from Brugen’s manual from 1616. Because of the skills I gained in the Bara Workshop, I was able to use the measurements noted in the manual to create the draft . The proportional drafting method resulted in a perfect fit the first time . The manual in its entirety is available here .
Making the trim needed to happen before the construction of the garment. Based on the portrait, I wove a gold scrolling heart design. Using the same thread, matching wrapped buttons and figerlooped button loops were crafted
Fabrics used for the veste are red and white shot dupioni, linen canvas with wool interlining, and red silk taffeta lining. The first part was making up the insides. This is identical to the construction of a doublet as the back acts as a stay to hold the veste close to the body in front while allowing it to flare in the back.
Pad stitching the lining.
Whipping over the ends to prevent fraying and to conserve trim.
Corners on a dime!
Fingerlooped cord plunged through and whipped on the back for button loops.
Hooks and eyes are the hidden closures to keep the strain off the metallics.
Last step is binding the armscye.
And the finished outfit is ready to wear!
References
Allori, Alessandro. Portrait of a woman with a lute. Retrieved July 14, 2017, from http://www.the-athenaeum.org/art/detail.php?ID=251679
Arnold, J. (1985). Patterns of fashion the cut and construction of clothes for men and women, c1560-1620. London: MacMillan.
De, L. R. (1970, January 01). Geometria y traça perteneciente al oficio de sastres… por Francisco de La Rocha Burguen,… Retrieved July 14, 2017, from http://gallica.bnf.fr/ark:/12148/bpt6k8549738/f1.image
Moda a Firenze 1540-1580: lo stile di Eleonora di Toledo e la sua influenza. (2005). Polistampa.
Looking good isn’t just for court. Working class garb can be rewarding to make and fun to wear.
My inspiration for this dress was found in a fresco by Federico Zuccari, 1579 .[1]
What I particularly loved about this style, is that both the woman tending the fire and the woman serving both have overskirts covering their dress in addition to an apron. Both dresses appear to be front fastening which would facilitate easy dressing.
While these dresses likely would have been made from wool, there is a wool-linen blend extant dress of a similar style currently located at the Museo Nazionale di Palazzo Reale. This extant dress features a high neckline and skirt made of rectangular panels. My dress is made from linen so as to be washable and cool to wear in the humid summers here.
The interlining of the bodice is made from two layers of linen canvas pad stitched together to provide shape and suport. The blue linen of the dress was then wraped around the interlining and stiched in place using a small back stitch. Then the bodice front and back were stitched together at the shoulders.
Then the trim! I used handwoven ¼ inch cotton petersham as it is machine washable and makes curves and corners easy to do. It was stiched in place using a prick stich and has held up beautifully through multiple washings. After the trim was set, hooks and eyes were place up the front for easy fastening. The linen lining was then sewn on using slip stitch.
Like the extant dress in Pisa, rectangular panels were used to construct the skirt. It was sewn on to the finished edge of the bodice using very small cartridge pleats. The hem was finished with a strip of wool to provide stiffening and prevent the wicking from mud and dew.
The sleeves are also linen and tie on at the shoulders with red cotton tape through metal eyes. Each of the ties is finished with a metal aglet.
The overskirt is also linen gathered into a waist band that is also the casing for a drawstring.
A linen apron tied with ½ linen tape finishes the outfit.
[1] Federico Zuccari, 1579 [Public domain], via Wikimedia Commons
The wait is over! Pantone has announced the color of the year for 2017 and it is Greenery! This vibrant green choice means more fabrics available in the coming years in similar green shades. You might be wondering why this interests a historical costumer, let me share my joy! Brilliant greens have been sought after colors for dresses in several time periods. Here are a few of my favorite green gowns.
Detail, Portinari Triptych, Hugo Van Der Goes (c. 1475)
http://tinyurl.com/z7tt9et
Girolamo di Benvenuto, Portrait of a Young Woman, Italian, 1470 – 1524, c. 1508, oil on panel, Samuel H. Kress Collection
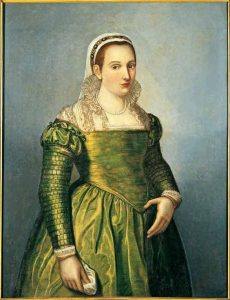
Portrait of Vittoria Colonna by Girolamo Muziano1528-1592
http://tinyurl.com/j9ulv6j
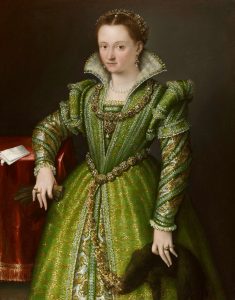
Portrait of Laura Gonzaga in Green
Lavinia Fontana (Bologna 1552 – Rome 1614)
http://tinyurl.com/zl5fw57
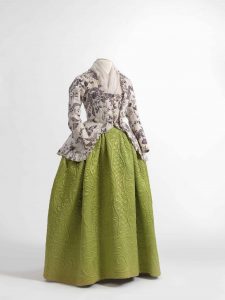
Caraco jacket in printed cotton, 1770-1790, skirt in quilted silk satin, 1750-1790
http://tinyurl.com/hk7tq9r
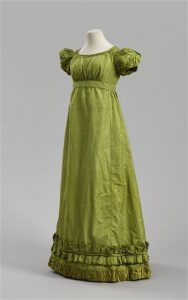
Robe Empire 1810-1815
http://tinyurl.com/j97jbhl
In recognition of this season’s color we will soon have our Bali and Pistachio cotton laces in stock along with a variety of greens already available.
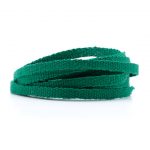
Winter Green
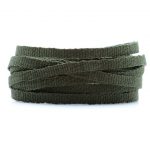
Loden
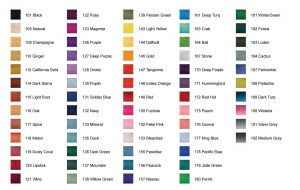
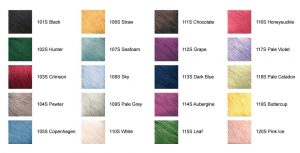
All of our cotton colors are available in custom widths and many as petersham by custom order.
Cotton Colors
Silk Colors
Be the first to know about new products and sales by signing up for email alerts.